User Manual
Pharmacy/ Pharmacist Flow
Registration Module 2
SignUp Form of Pharmacy :
Step 1: Fill the following fields as
- Name
- Postal Code
- User name
- telephone number
- Accreditation
- Fax
- Street
- Email city
- Pharmacy type
- province
Step 2: Click the “I Agree” Option to accept terms and conditions.
Step 3: Submit for registration and check the inbox for password reset mail
Step 4: Click the link from email and reset the password
Step 5: Reset the password and login to see the Pharmacy dashboard
In Pharmacy dashboard
Create Internal Pharmacist :
Step 1: Click Create Internal Pharmacist
Step 2: Fill the Fields
- First Name
- Last Name
- Phone
- Province
- Select an option
- Address
- Street
- City
- Province
- Postal code
- Country
Step 3: Click submit
Step 4: Internal pharmacist will be created
Add Pharmacy
Step 1: Select the add pharmacy tab
Step 2: Search the registered pharmacy
Step 3: Add pharmacist to this pharmacy from the entire pharmacist list
View Pharmacy
Step 1: Select the View pharmacy tab
Step 2: Search the registered pharmacy
Step 3: Entire pharmacist list who works on respective pharmacy
Minor Ailment:
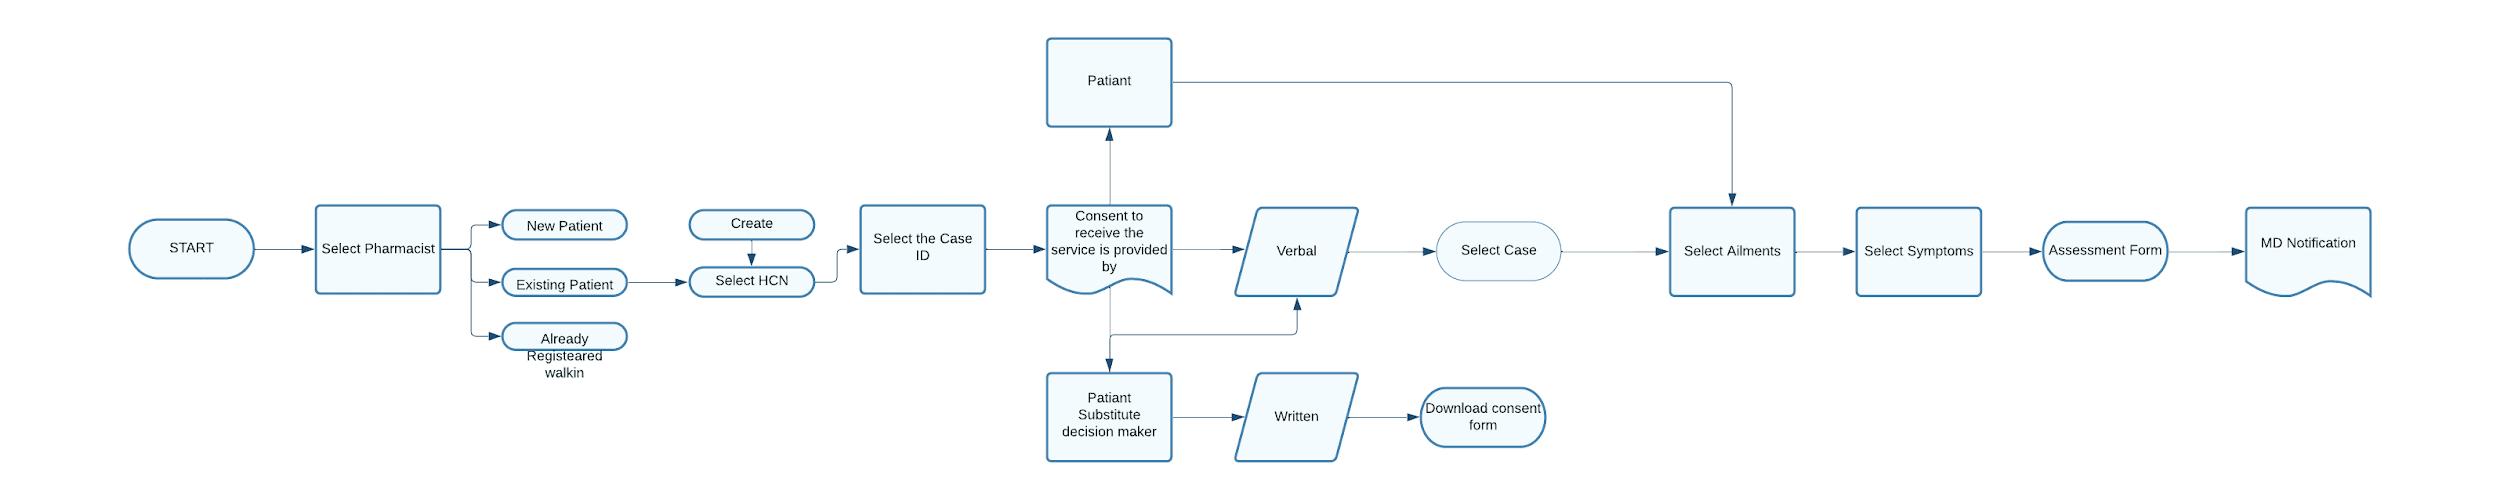
A. Select the pharmacist >
B. Register Patient >
C. New Patient >
D. Health Card Number >
E. Select the request >
F. Select the Patient >
G. Patient / patient subsidiary >
H. Fill the Ailment process >
I. Rationale >
J. Medication >
K. MD Notification
BioSimilar :
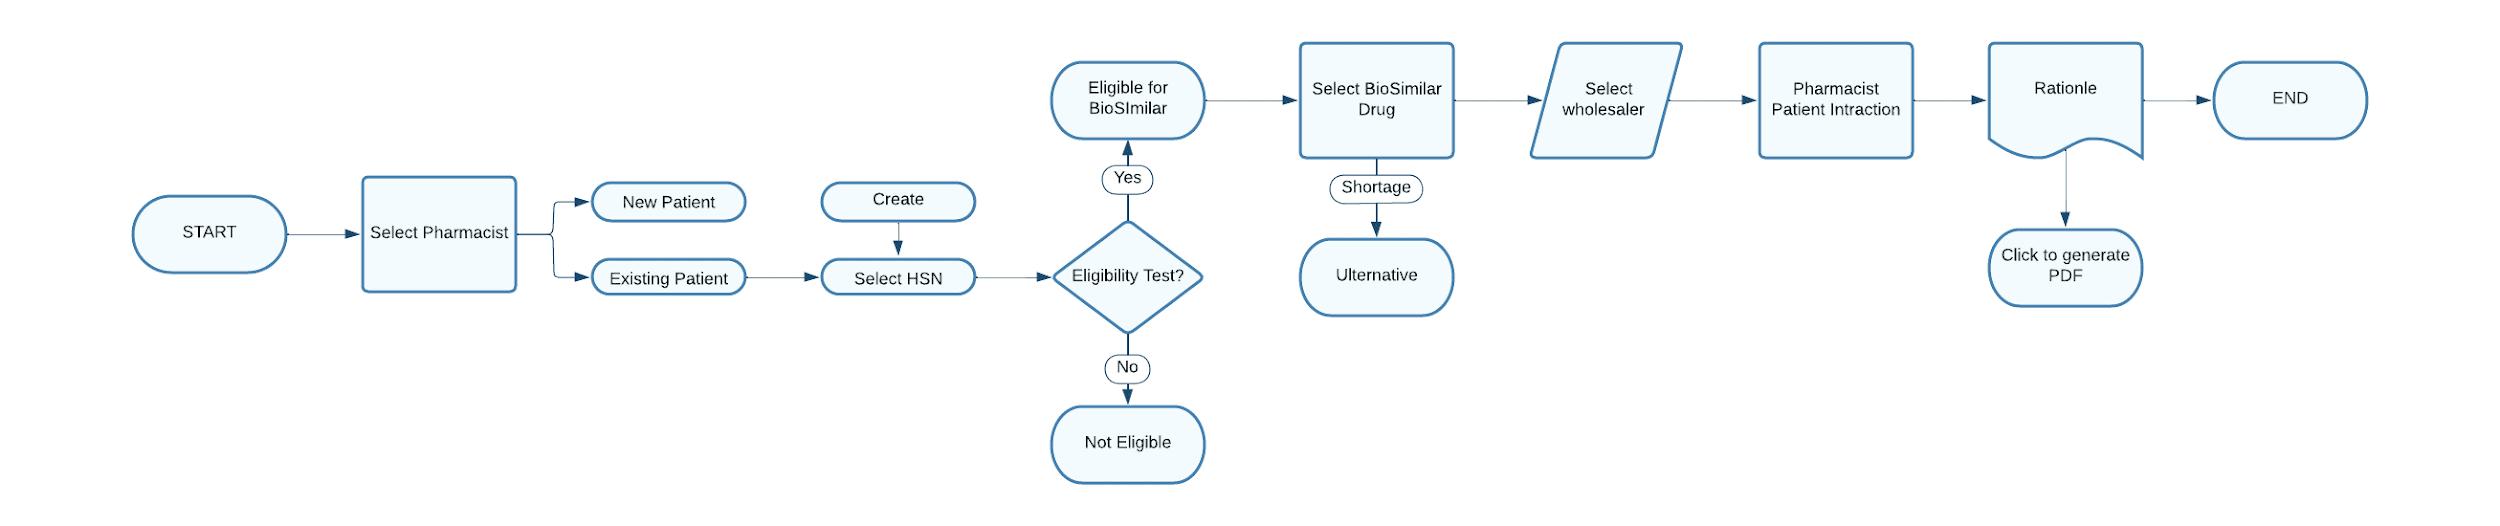
a. Select the pharmacist > b. Register Patient >
c. New Patient >
d. Health Card Number >
e. Select the request >
f. Select the Patient >
g. Patient / patient subsidiary >
h. Fill the Ailment process >
i. Rationale >
j. Medication >
k. MD Notification
Data Loader – Installation Procedure :
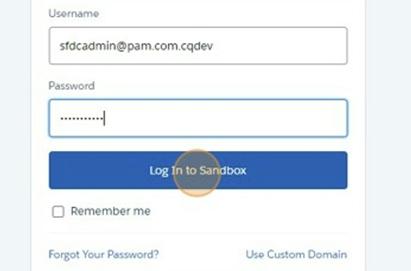
Step 1: Open Salesforce Org -Sandbox
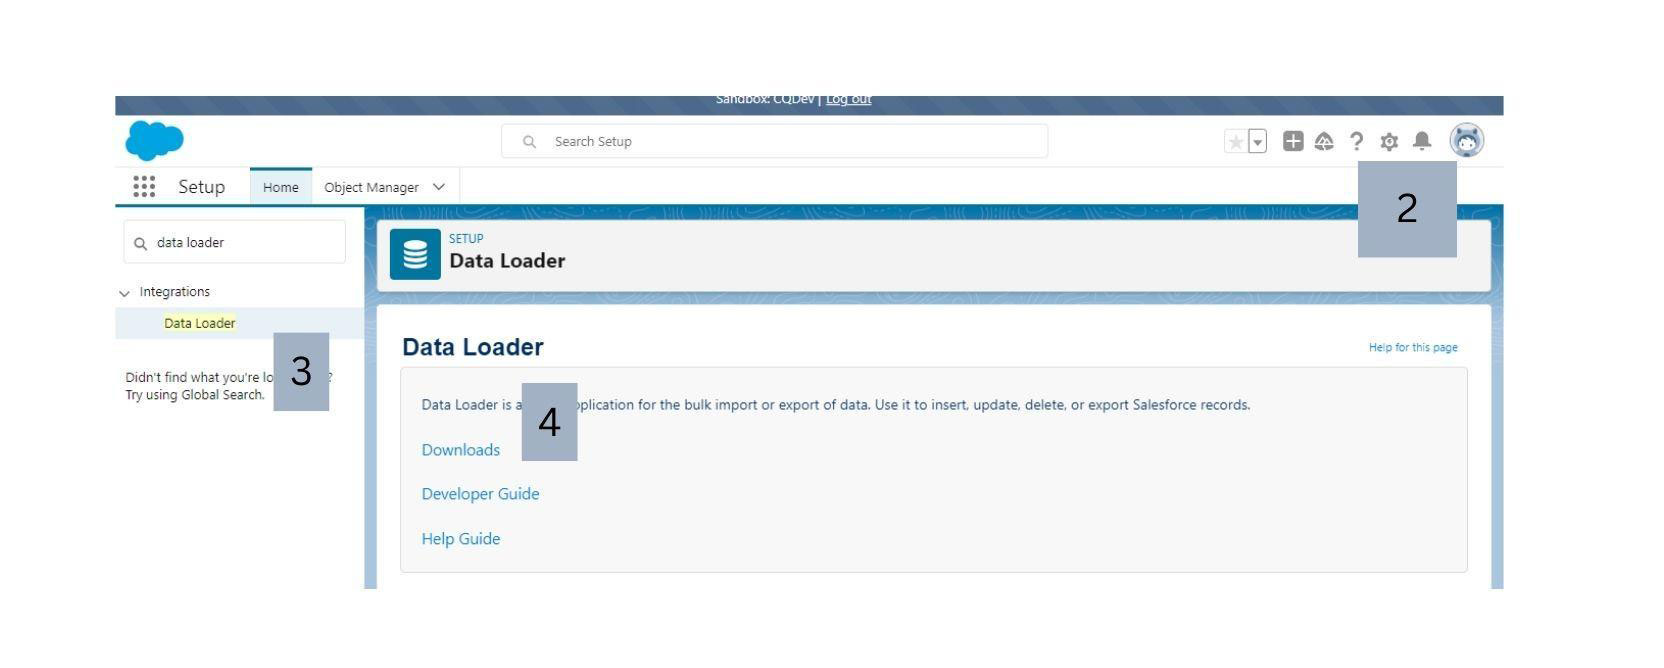
Step 2: Then after Org page opens, Click Gear icon , and then select ‘Setup’
Step 3: Search for ‘Data Loader’ in Quick Find Box.
Step 4: Click Downloads
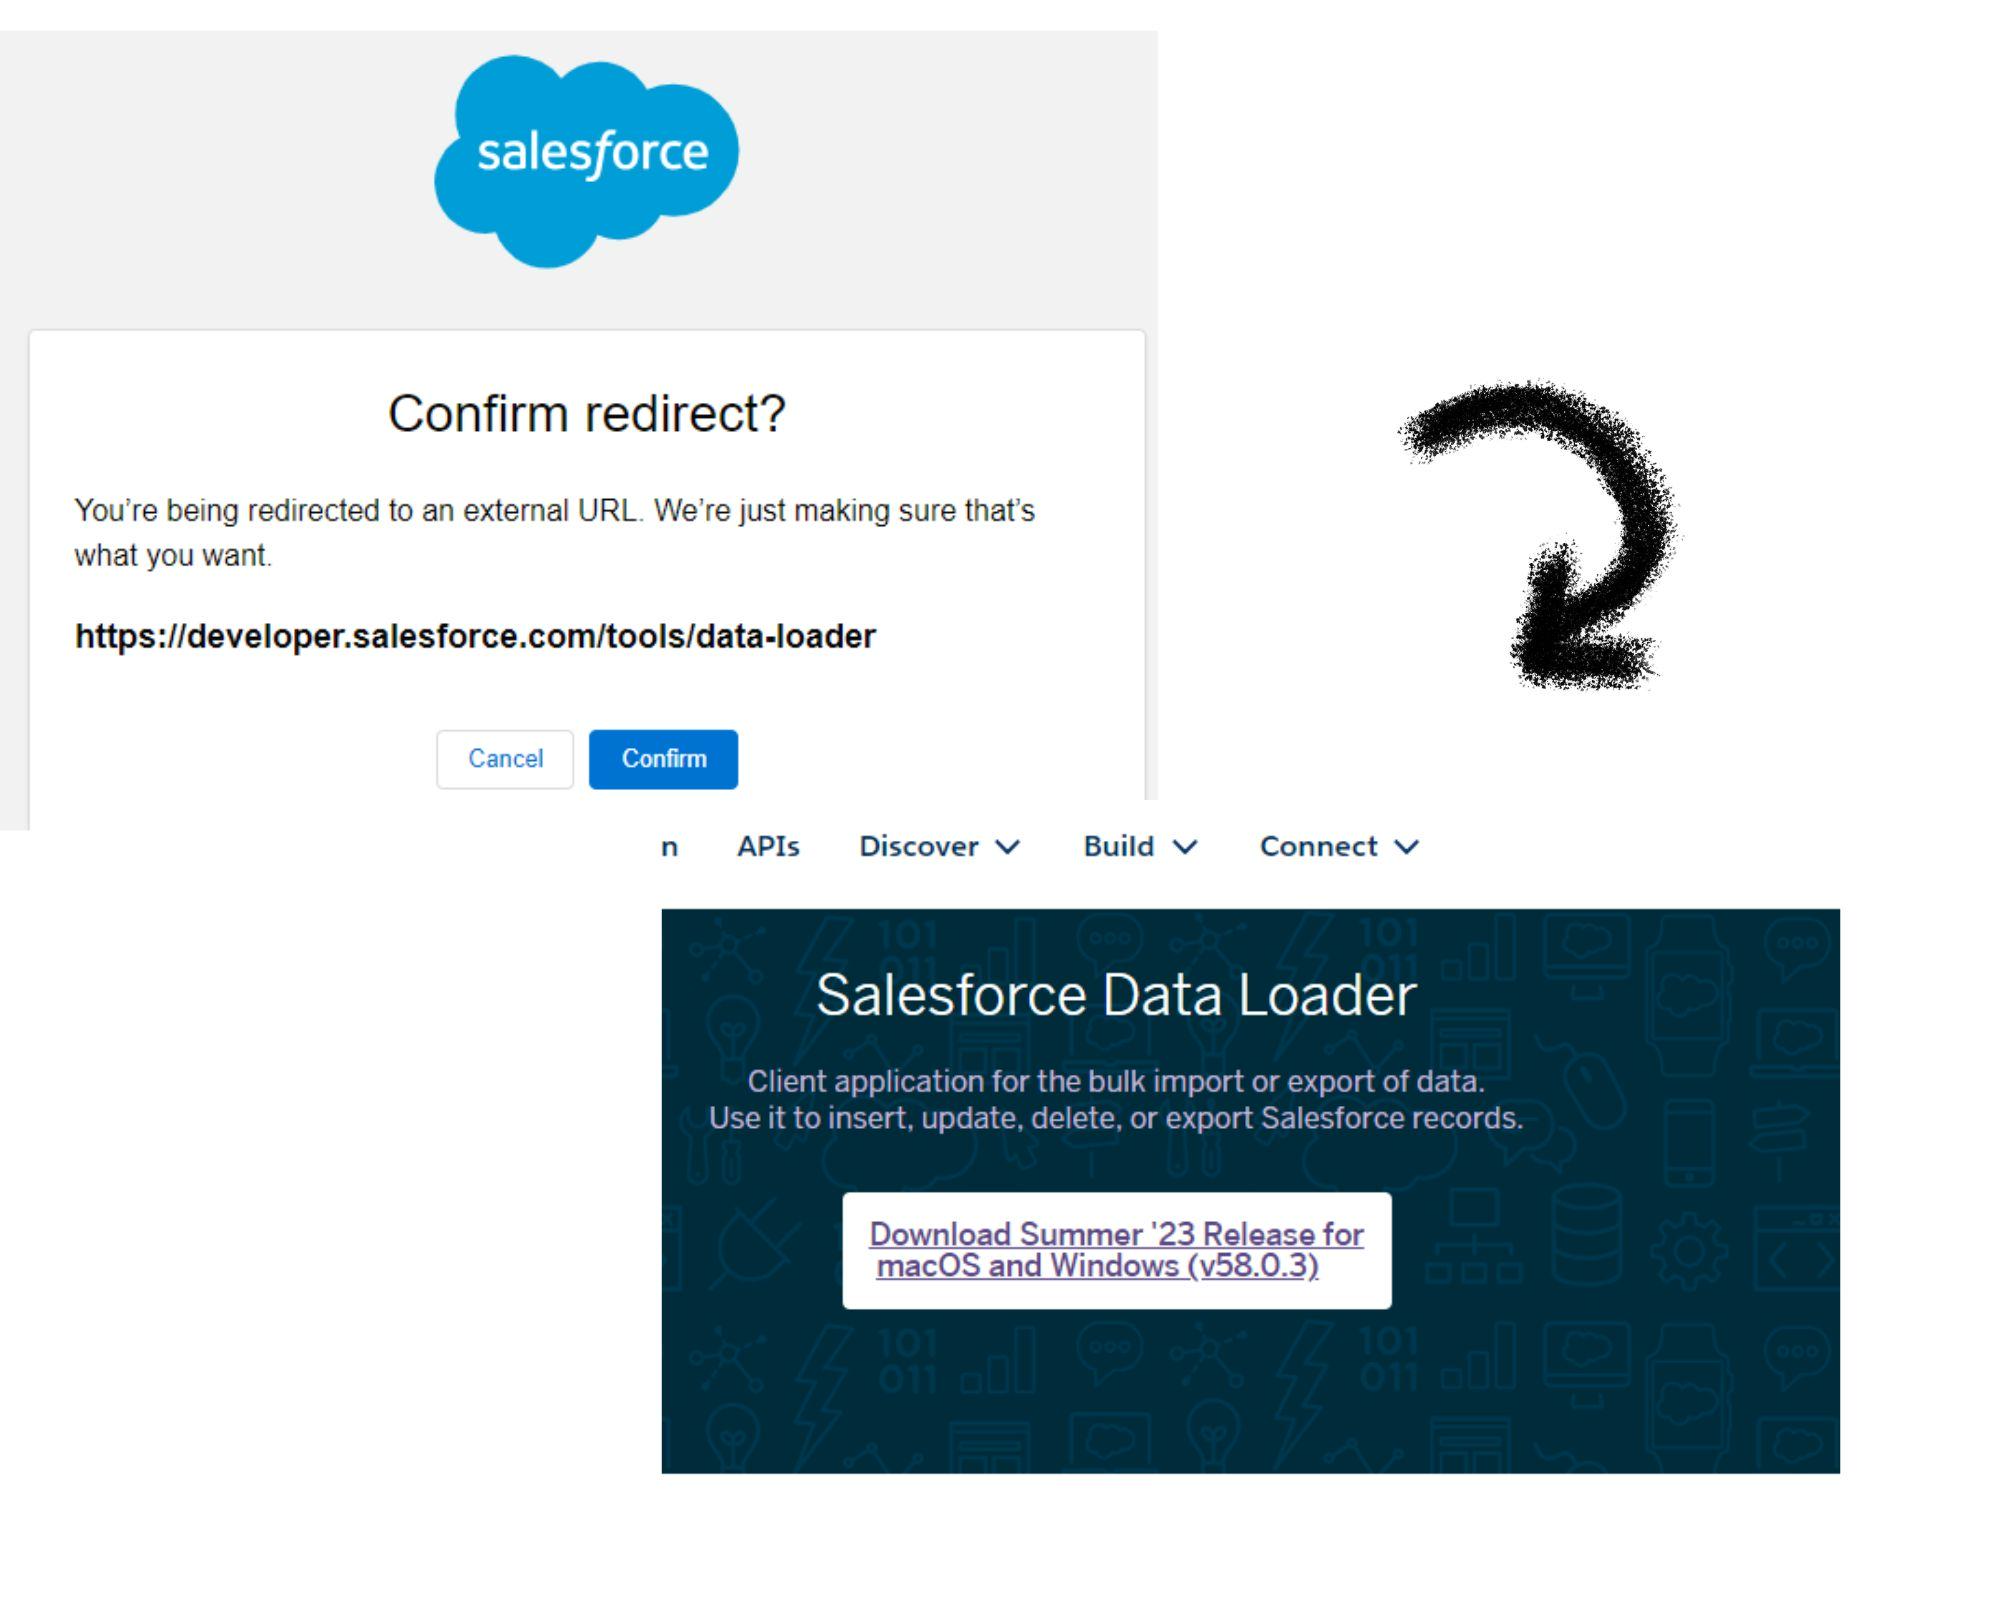
Step 5 : And then click ‘Confirm’ and then click on the link to download ‘Data Loader’
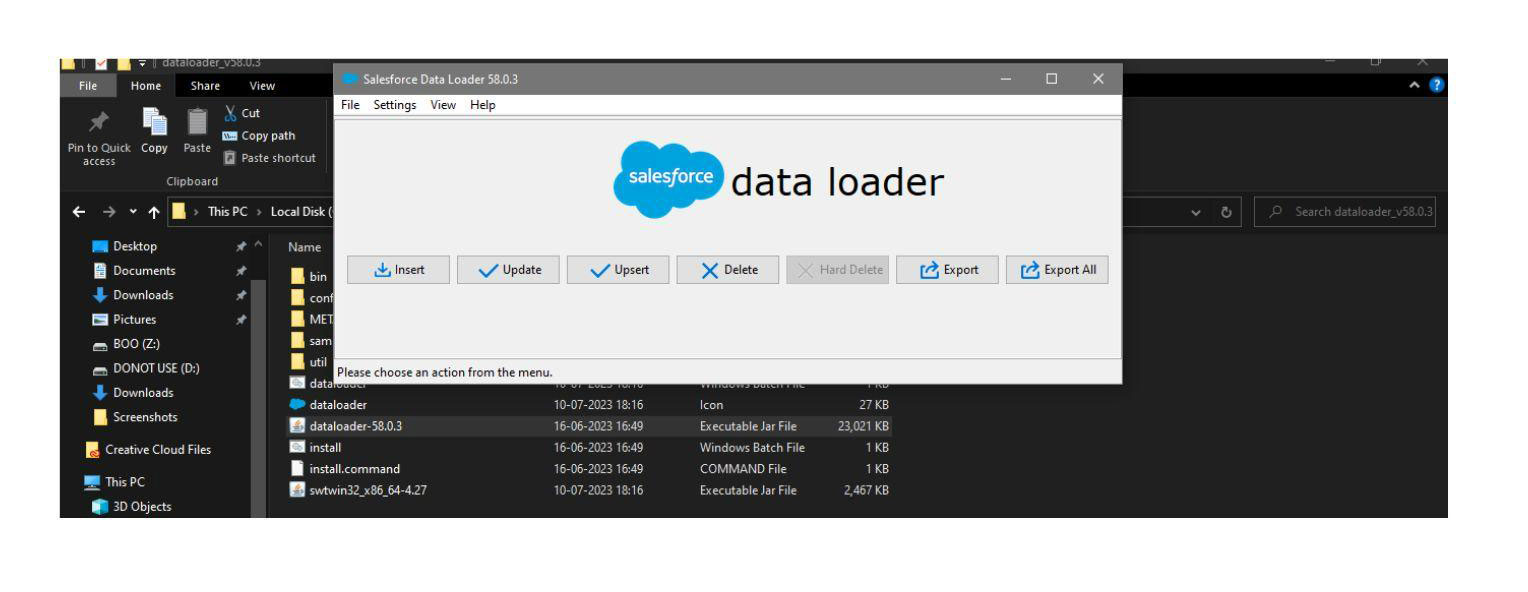
Step 6 : Extract the Data Loader from the downloaded ZIP file and on the Data Loader folder click on ‘Dataloader – 58.0.3’ , A tab opens & click on the ‘INSERT’
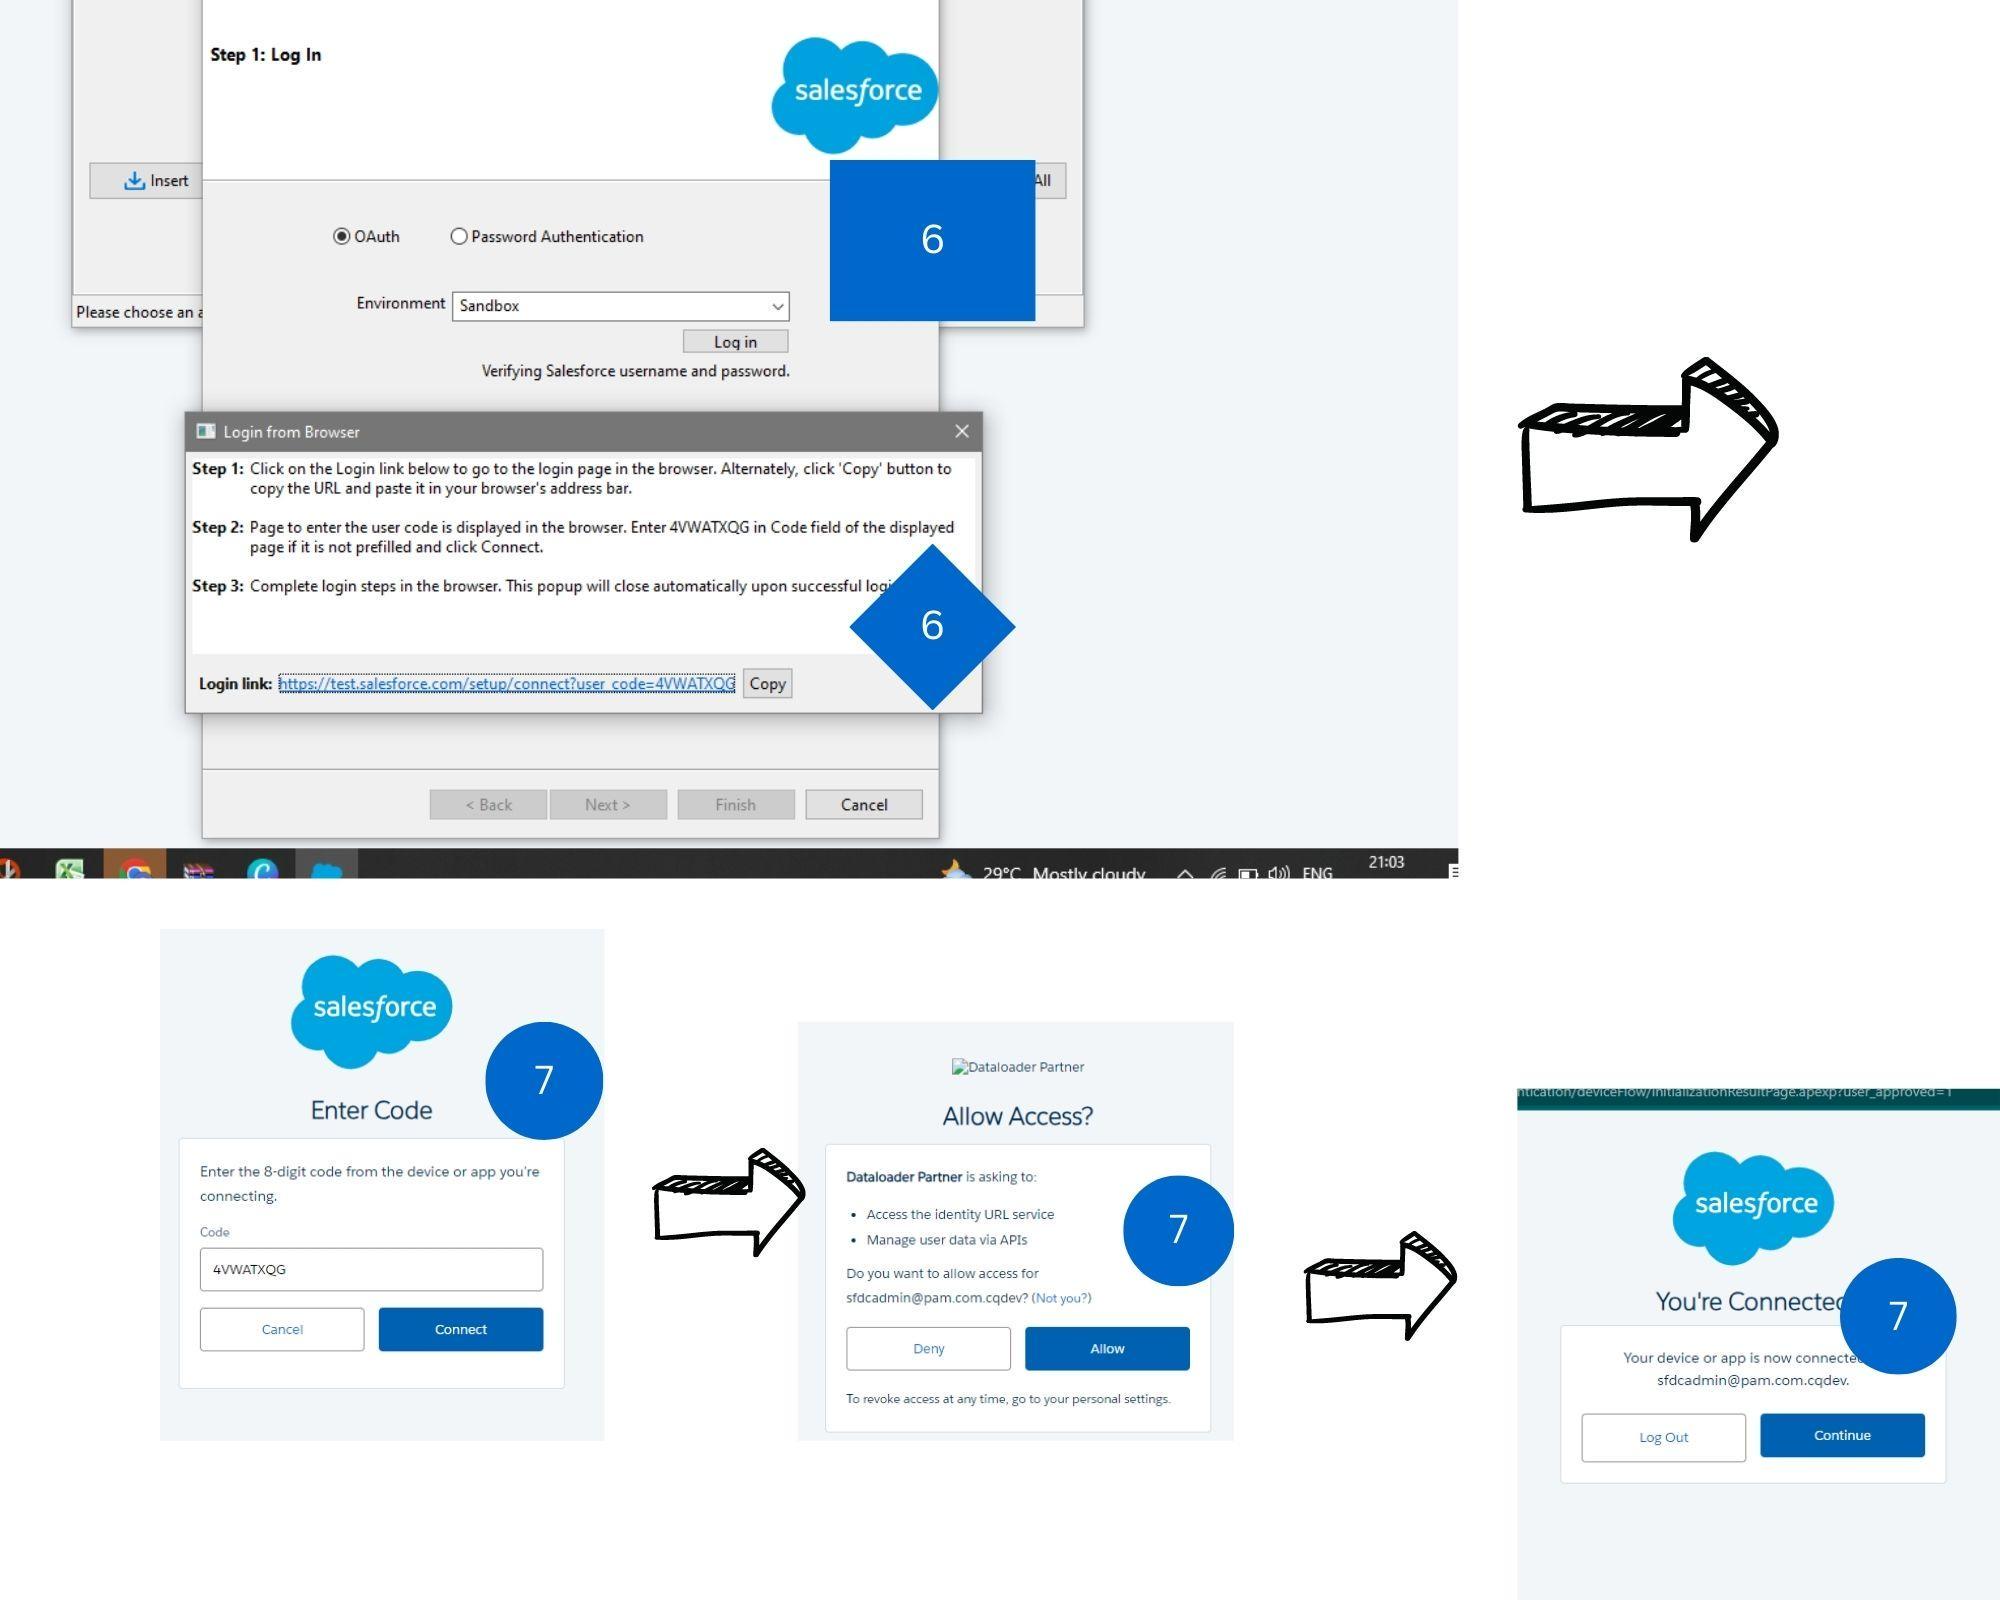
Step 7 : After clicking on Insert – a tab opens, select ‘Sandbox’ from dropdown box > login > Click on the link
Step 8 : Then click Connect > Allow > Continue
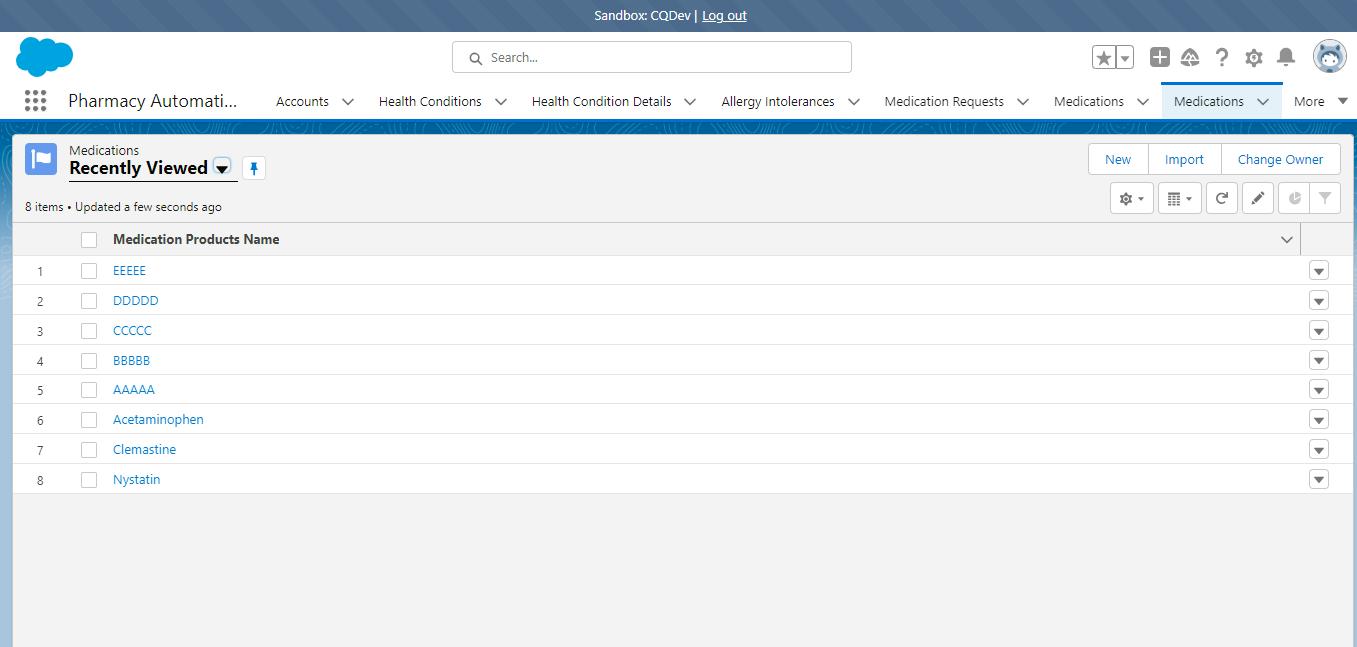
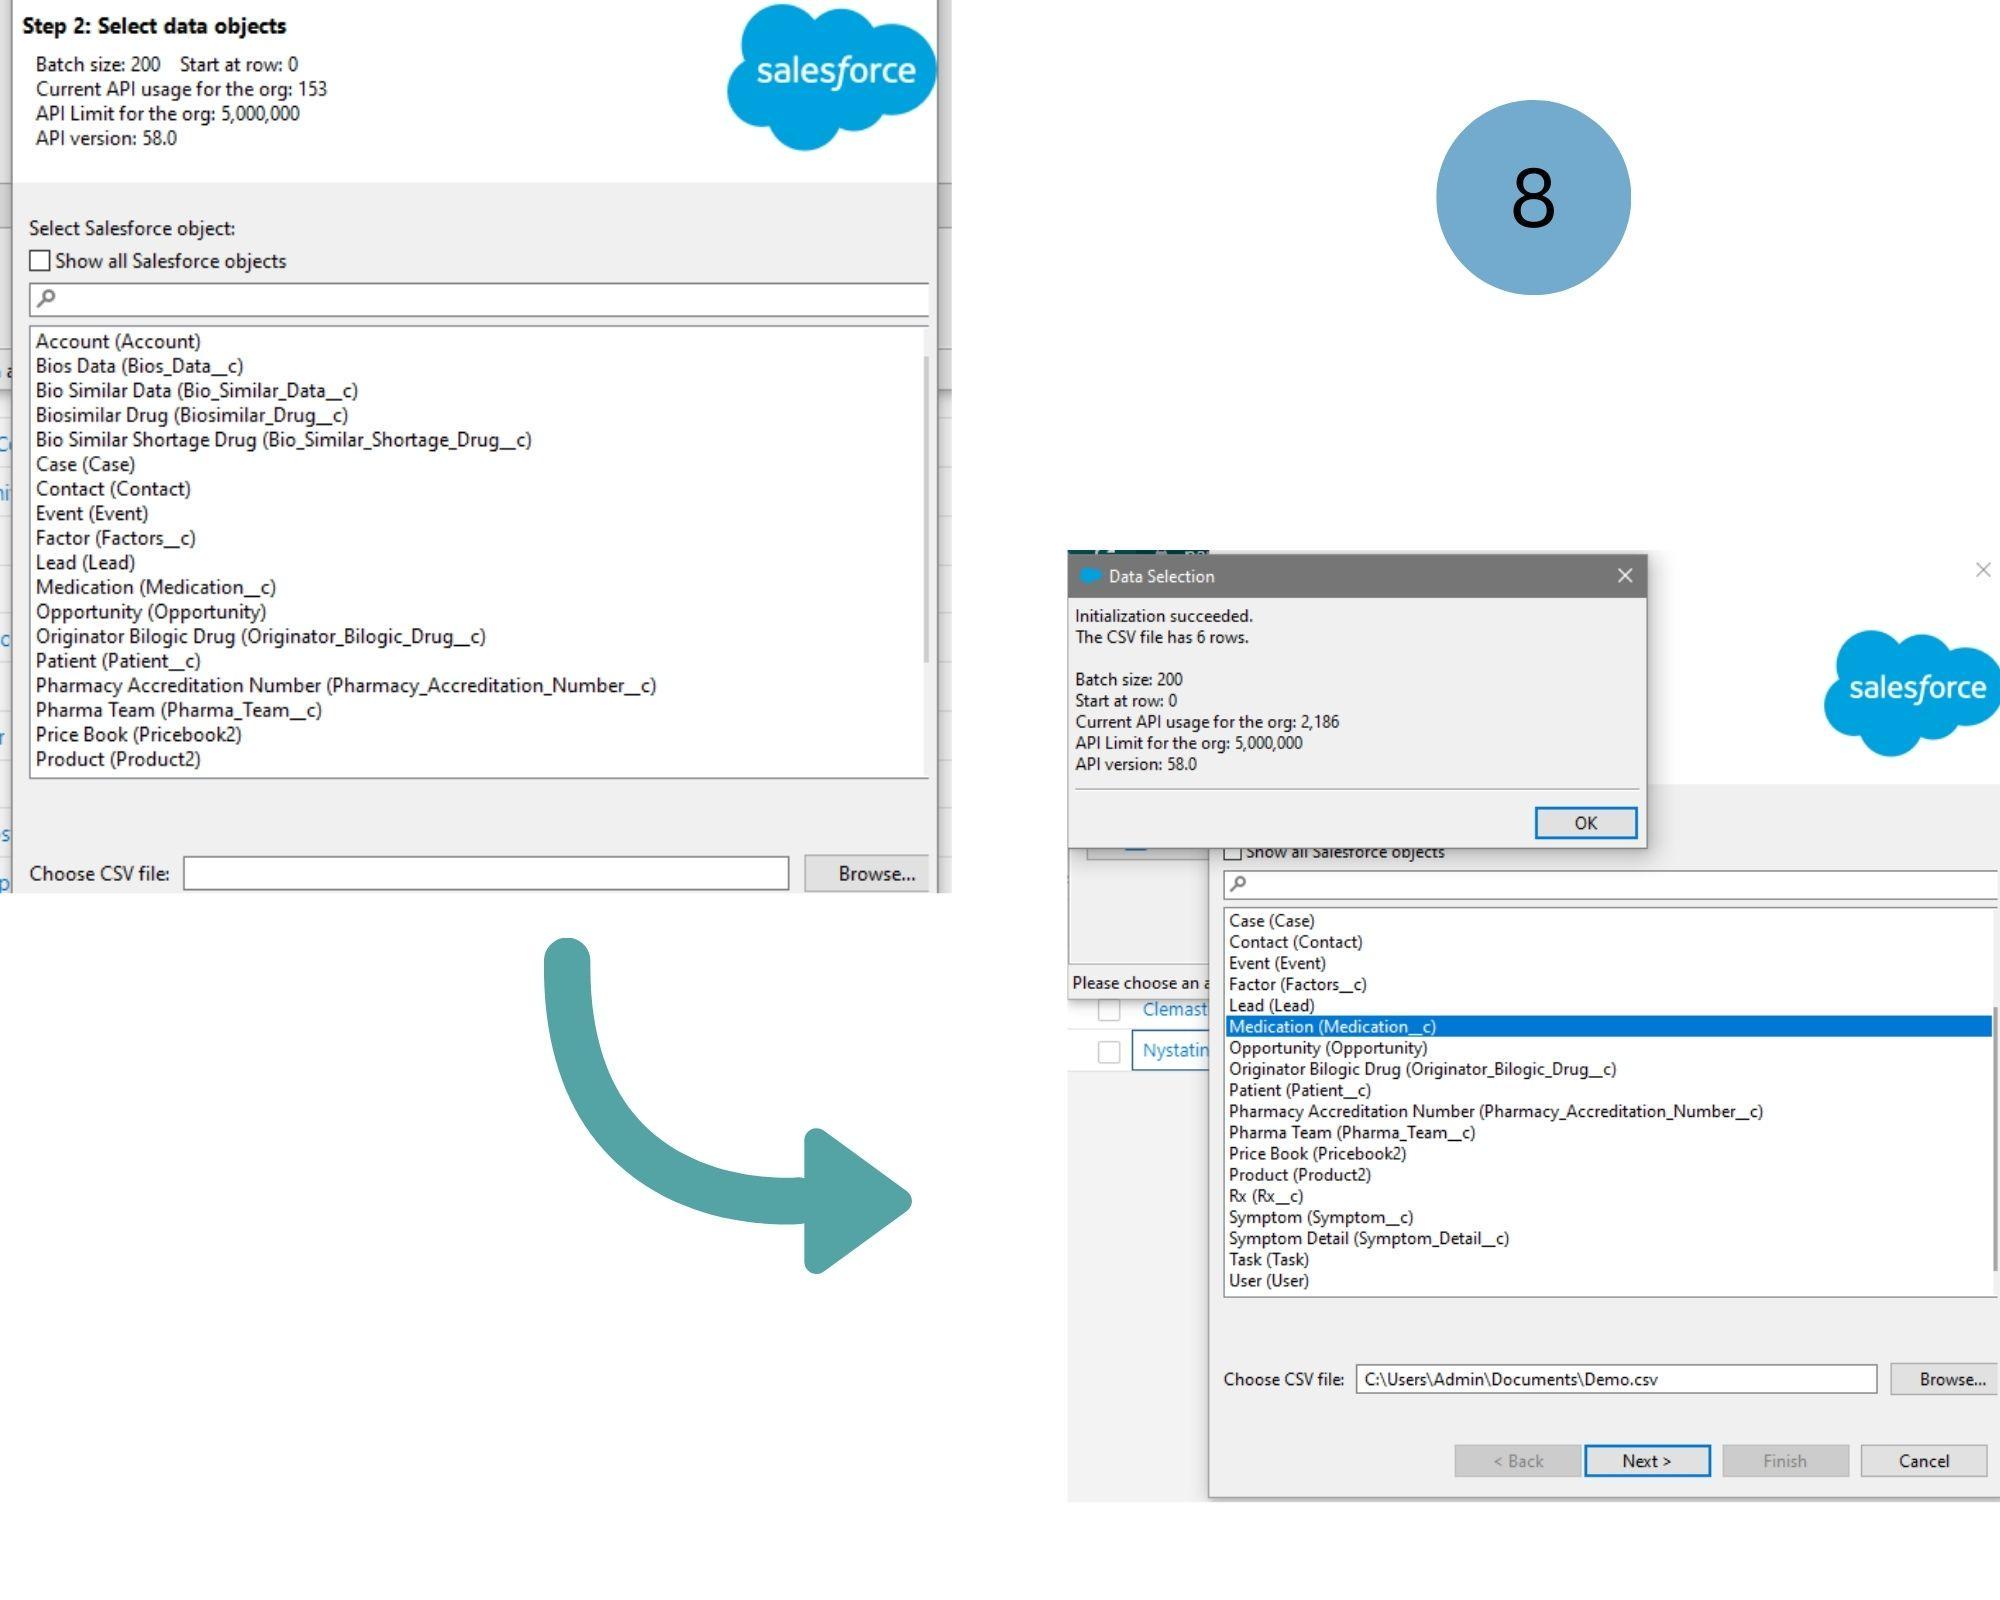
Step 9 : After verifying the Sandbox, Data Loader allows you to import CSV files on the Data Objects in which want to add data.
Select Data Object in the tab > Browse the CSV file > click ‘Next’ > Ok
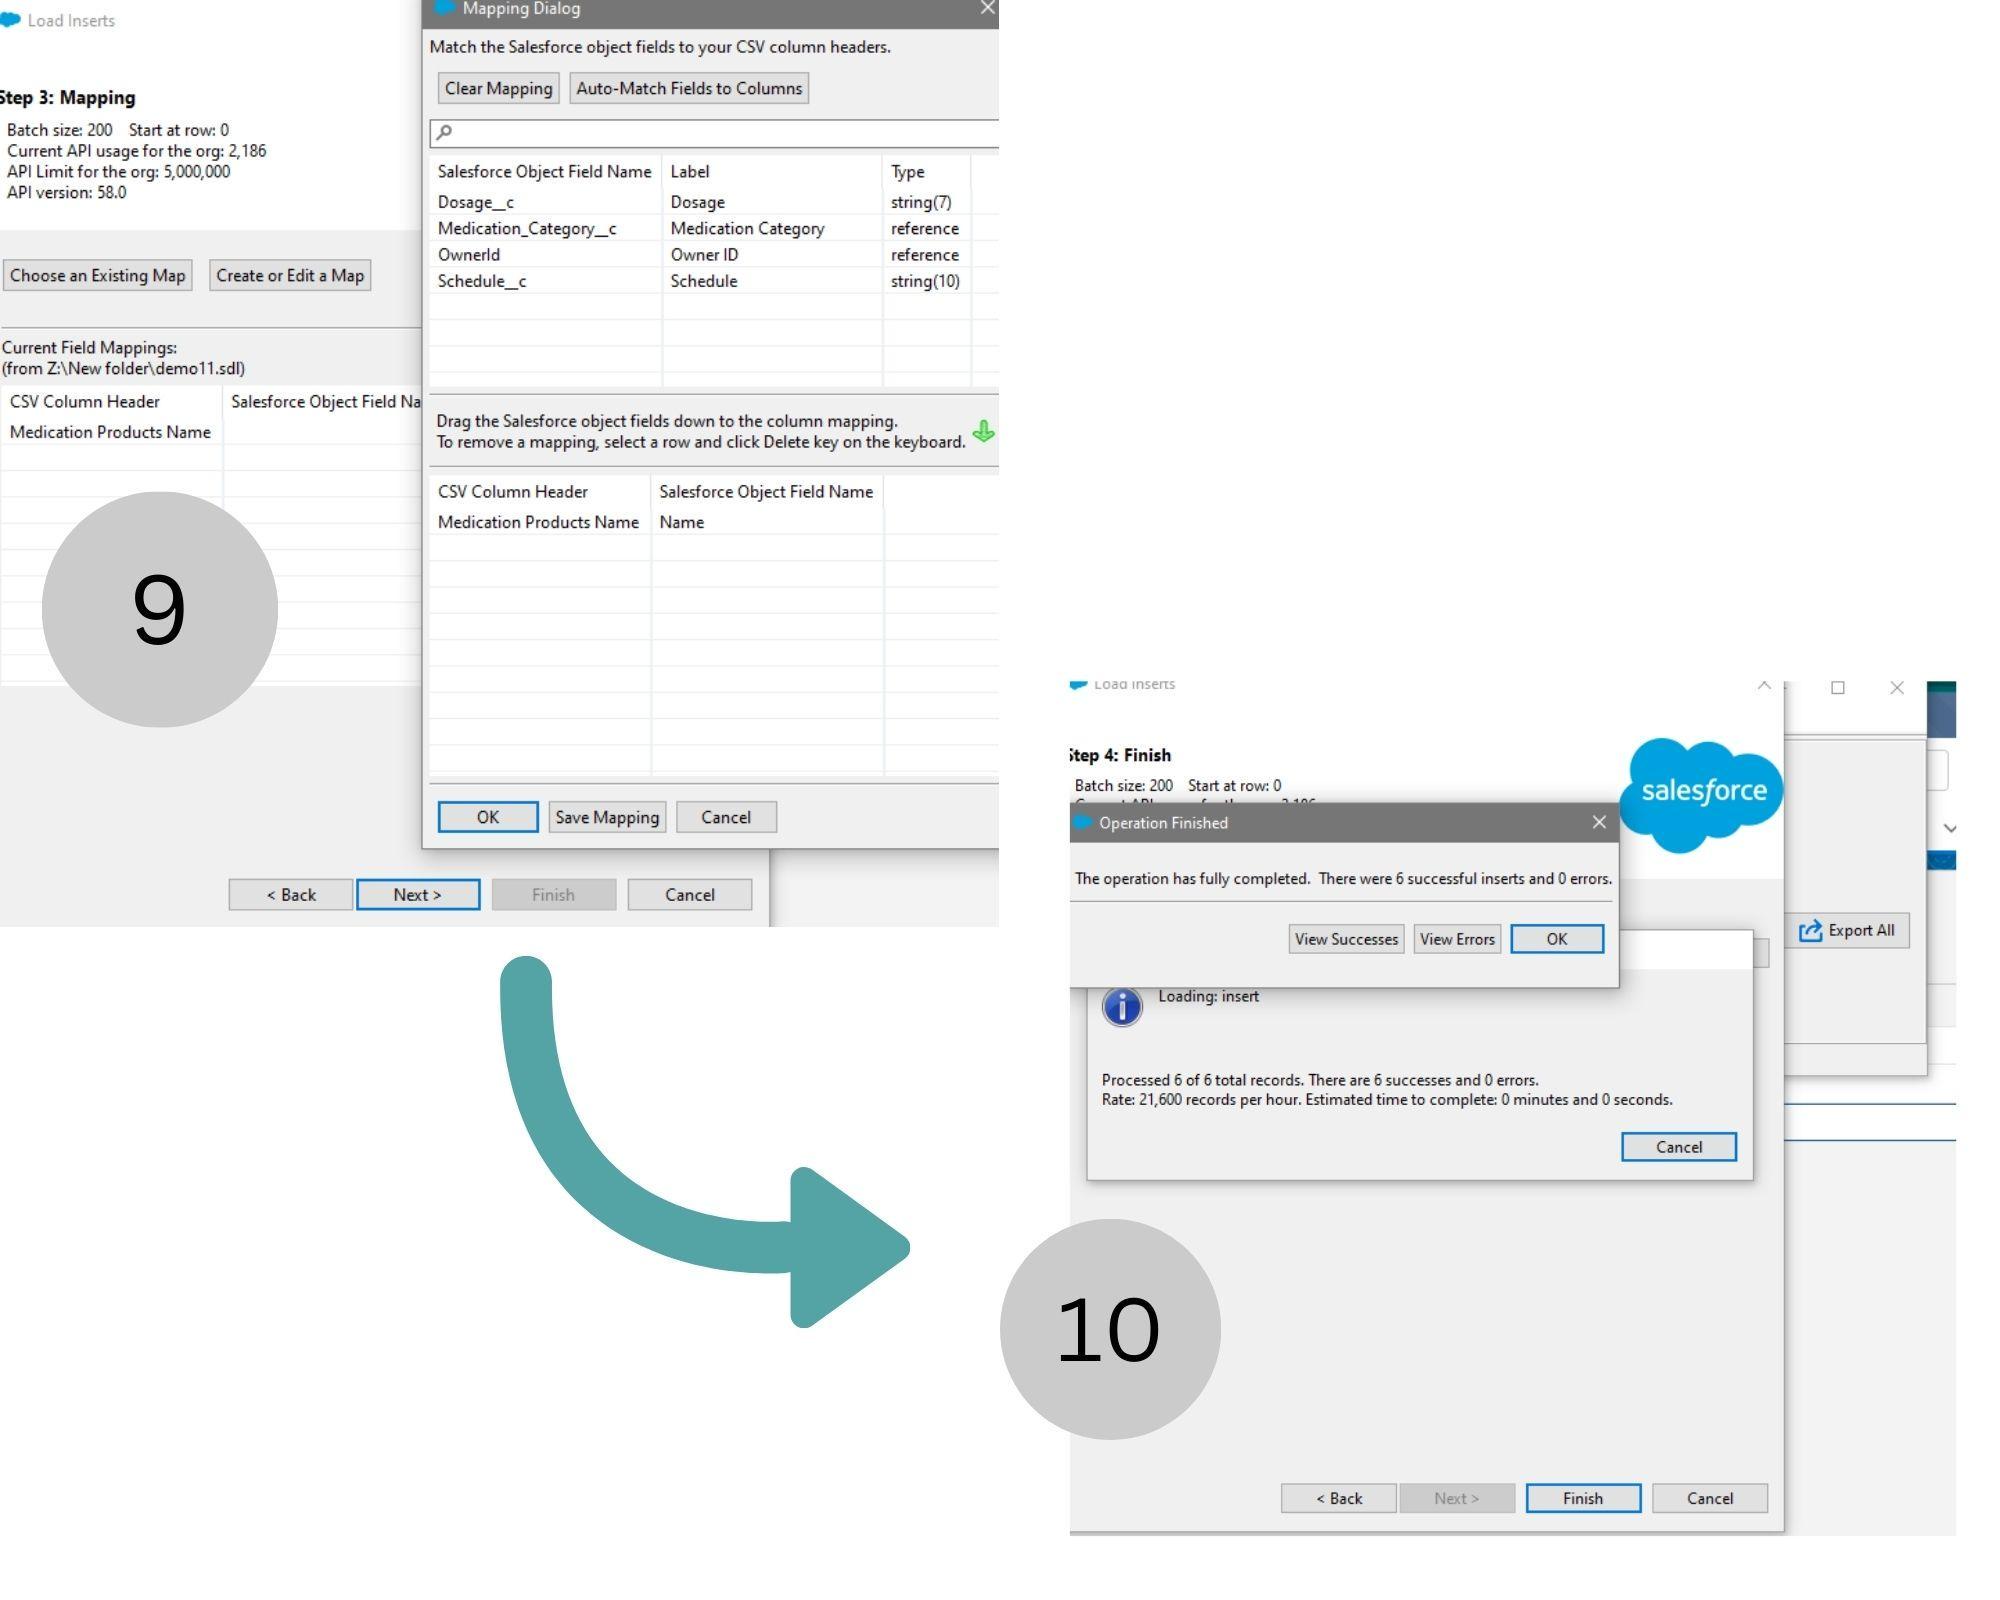
Step 10 : Next Step Is to Map the data to the fields on the data Object
Click on Create or Edit Map > Drag & drop the Salesforce Object Field name to the bottom > Save Mapping ( For instance , Here Medication field is taken as a example to import Names in it)
Step 11 : Then Next > Ok > Finish , Files will be import to the Chosen Data Object
Step 12 : Finally to check whether Data is imported to the Data Object , Check in the Object of the Production or Sandbox org in which data is inserted.